Pages

22 November 2013

Easy and quick way to get your pomegranate fix and take out your frustrations

'Tis the season for one of the most tasty fruits ever: pomegranates. Pomegranates are to the fruit world what we might call auto-cockblockers: they're so difficult to peel and extract the fruit that it's like they purposefully evolved that way... hard-to-get, yet strangely making them more enticing, attractive... clever, but not more clever than us!

Thankfully, there is the Internets, and though it's 99% littered with garbage, the rest is actually useful; many bloggers/vloggers have shared many different ways to get to the pomegranate fruit (WHICH, technically-speaking are NOT the seeds, rather are the arils (or outgrowth) that contain the seeds).

Pomegranate arils
The easiest way I have found so far is whacking the fruit with a spoon (or in my case, was a tiny frying pan stolen from a tiny dwarf).

There is no longer any need to pick out every individual aril and sully your hands to get to the fruit. Let you your frustrations out and not get arrested! (Great for if your boss has been on your case for the tiniest, most irrelevant issues that don't prevent the job from getting done but because he is extremely uptight and missing the big picture... but I digress.)

Here's how to beat your pomegranate:
  1. Score the pomegranate fruit all the way around its "equator" (crosswise, I guess). Don't slice too deeply into the fruit.
  2. Twist both halves apart.
    Pomegranate split in half
    A pomegranate split in half. O, the horror! 
  3. Take one half and loosen the arils from the membrane (mesocarp) all the way around by gently pressing on the sides from the outside. Repeat massage with other half.
  4. Hold the pomegranate half from underneath over a bowl with the open side downwards and smack the outer skin all the way around until all the arils have dropped into the bowl. Repeat the abuse with other half.
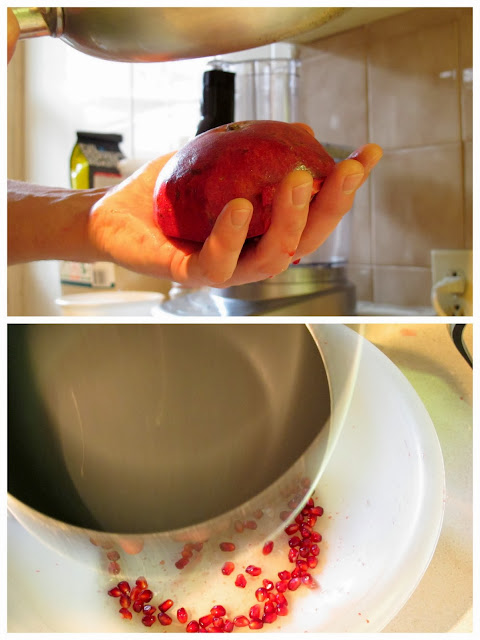
    Tapping the pomegranate
    Tap that pom.
And you're done. No peeling, no post-pom-peeling countertop murder scene (well, only a minor one at least).
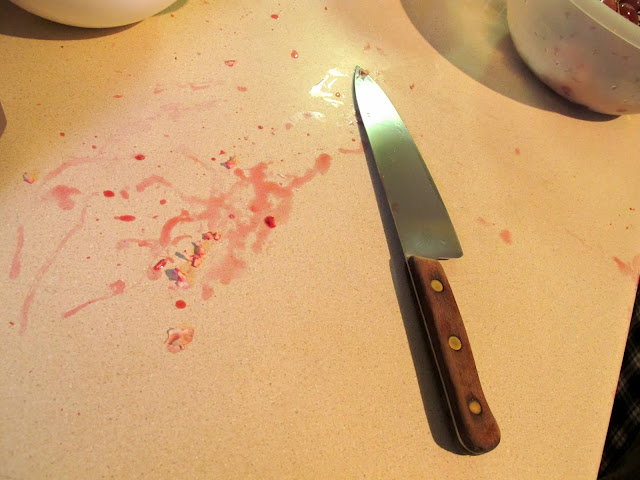
Aftermath of the Pomegranate War of 2013
Aftermath of the Pomegranate War of 2013. You could avoid this if you want by putting a dishcloth under the bowl.
(Thanks to via Lifehacker Whitson via boobtube user NaturalMarketer for the timesaving tip! Now I can get back to Minecraft King's Landing because "Winter is coming...")

02 August 2013

Making sorbet mountains out of strawberry molehills (now with basil)

Outside of Quebec City in Canada lies a mysteriously beautiful little island that poops out the best strawberries this side of the planet that are not genetically engineered; it is called l'Île d'Orléans (Island of Orleans).

My cousin, RayRay, and my brother, Subordinate Chow along with Minimai picked a mounded box of fresh strawberries from l'Île Orléans and only ate five from the box cause they had gorged on them at the U-pick and refused to eat any more.

And of course, the garden is once again overrun with basil.

Pair these two annoying harvests together and you've got music, or at least this strawberry and basil sorbet.

Strawberry basil sorbet, always dairy-free. The ice cream scoop (a lovely gift from La Popoteuse) looks like it was involved in a murder. Because it was. 
In trying to figure out what to do with the strawberries, I learned that the main difference between sherbet and sorbet is not just a couple of letters! They both use pretty much the same ingredients (sometimes including alcohol, used to lower the freezing temperature) but the key difference is as follows:
  • Sherbet: Contains milk, gelatin, or egg whites, usually butterfat content between 1% and 2%. 
  • Sorbet: No dairy, egg or gelatin. Good for the lactose intolerant. 
So here's to getting rid of an excess of strawberries, especially overripe ones.

Strawberry basil sorbet
(makes about 1 litre)
Inspired by Alton Brown and A Cook and a Geek
  • 2.5 litres of whole strawberries
  • 1/2 cup (125ml) granulated sugar 
  • 1/3 cup (75ml) light corn syrup (** corn syrup is less likely subject to crystallize than simple sugar syrup **)
  • Handful of basil leaves
  • 3 Tbs (45ml) lemon or lime juice
  • 1 to 2 tsp (5 to 10ml) lemon or lime zest (use a Microplane grater to get finer zests (not an endorsement... just saying))
  • 2 Tbs (30 ml) vodka (** makes it easier to scoop but is optional **)
  1. Blend the bollocks out of the strawberries in a blender or food processor.
  2. Add to the blender the sugar and syrup, vodka, lemon juice and zest.
  3. Roll up the basil leaves into cigars to slice them thinly without crushing them (chiffonade), then put them in the blender and pulse until evenly combined. 
  4. Freeze in ice cream/frozen yogurt, as per the instructions for your contraption.
Moskovskaya
Russian vodka is an excellent solute for freezing-point depression and post-exam depression. 
(And for those who hate basil, such as Frawley, you can refrain from using basil and instead use something like mint (using about the same amount) or experiment with lavender or pepper (though frankly, picking strawberry seeds from your teeth is enough of a pain in the arse that probably does not complement picking ground pepper out at the same time...)).

Bonus photo: [Left] My cousin RayRay and brother Subordinate Chow at Montmorency Falls circa 1989 and [right] circa 2013.  

01 July 2013

Witches' brew the conclusion: straight dope on palo azul

François M, the photographer of the palo azul blue witch tea I posted back here brought to my attention that he figured out by flicking his lights on and off that the blue was a type of fluorescence.

(Frankly, after the first tasting, I'm not sure why François and Lin made more of that tea, especially if it tasted like butt the first time...)

Serendipitously, François found that the blue colour wasn't as potent as before, while they made the tea at night under indoor lighting; he thought it was because the tea was just old and gross.

The next morning, however, he observed that the blue colour was actually quite strong in the daylight and that the blue colour was not, in fact, drug-induced, and no gremlins had broken in overnight. This, he determined, that it had more to do with the presence of UV light in sunlight and lack of it in household light sources.

And then Google barfed this out when he looked for fluorescent tea: Lignum nephriticum (meaning something like "woody kidneys" (hence its name, kidney wood).

[Palo azul in the morning light. Photo courtesy of François M. BTW, he is still for hire...]
So for those who think this blue witch tea has magical properties, once again, science quashes magic. It might be a diuretic but frankly, you could just drink lemonade to help you urinate if you're that desperate.

(François is now waiting for a UV flashlight he just ordered to confirm his theory...)

(I know I have many excuses for the lapse between posts, and they are numerous but valid and I will fight anyone who complains.)

31 March 2013

Easter bunny face egg surprise ending

I picked these egg molds up in Tokyo, at Tokyu Hands, also known as the best store in the world. They came in handy for making Easter-themed gobbledygook.

[Bunny and teddy bear face egg moulds (yudetama gokko)]
Basically, take some boiled chicken eggs, peel them while they're warm and then plop them in these kawaii-shaped molds called yudetama gokko, which is Japanese for "make your food cute so people don't think it tastes gross" (though the Interwebs tells me the alternate meaning is "boiled egg make-believe").

Drop them in ice water for 10 minutes or refrigerate them until they're cool. Then you can unmold them and destroy their cuteness, as you wish.
[Ugly egg Easter bearface and bunny. I don't know how to order these adjectives anymore.]
Here comes the kicker:
[Original Juan cayenne hot sauce photobomb (it's not that hot but it's pretty tasty)]
And the money shot.
[Caesar-flavoured hot sauce boiled eggs shaped like cute animals. There must be an adult film about this. ]
No chocolate eggs for me, thanks... only the real deal with hot sauce this holiday. Happy delicious Easter, folks!

21 February 2013

Superstitious sesame balls for Year of the Snake

This past February 10, we celebrated Chinese New Year, the age-old holiday that brings families and friends together, highlighted by bringing out the most superstitious traits of Chinese people around the world.

For instance, one is not to do any of the following on or during the New Year grace period:
This year, Year of the Water Snake, spells out booming economic progress, overcoming challenges, and for those born in a Snake year (like myself), a year of horrible bad luck.

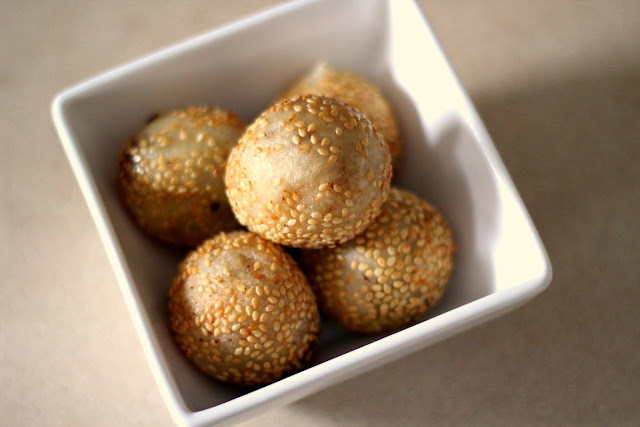
To hopefully counter my predisposed bad luck, I hoped that making eating sesame balls (zin deui 麻糰) would do the trick. Zin deui are those fat little deep fried balls filled with lotus seed, black bean (dau saa) or red bean (hung dau saa) pastes or sometimes nothing; you can usually find them year round at Chinese pastry shops.
Golden-ish sesame balls (zin deoi) for Chinese New Year
[These GD sesame balls better bring me good luck this GD year...]
I think I had better run through the roster of anti-bad luck practices this year because so far, it hasn't started out well: I got bit by a spider while I was sleeping, and if I get anything lower than a B average this semester, I will get demoted from "token Asian" to just "Asian".
Sweetened black bean paste in a can
[Mung bean-based "sweetened black bean paste" in a can. Safe cause it's from Taiwan. Otherwise made of childrens' socks in China.]

Anyways, here's how to generate your own good luck (in good Engrish).

Sesame balls (Zin deui)
Makes 10-12 small balls
  • 1.5 to 2 cups (~175g) glutinous rice flour (best to weigh this because the metric measurement is more accurate)
  • 1/2cup (125ml) water or a scant more
  • 2 Tb (25g) sugar
  • 1 tsp (5ml) baking powder
  • 1/2 cup (~50g) sweetened black bean (like the stuff in mooncakes), red bean or lotus seed paste
  • Sesame seeds for coating
  • Vegetable oil for deep frying
Do it here:
  1. Heat oil to a balmy temperature, prefer 350°F, in a pot deep enough to allow the balls to swimming.
  2. Dissolve the sugar in water.
  3. Merge baking powder into the glutinous rice flour.
  4. Mix sugar water in with the flour mixture until it gathers into a ball.
  5. Disconnect dough into 10 or 12 pieces same size. Roll each one out into a ball, about 0.5cm thick. Keep them covered with a humid.
  6. In hand, place one flattened ball, poop one scant teaspoon of black bean paste in the middle. 
  7. Pinch sides together as evenly as possible, making sure there are no cracks or whores.

    (Chow note: ensure the ball is well-sealed; if there are cracks, they will end up looking like a pubescent pimple—volatile yet strangely fascinating, comme ça:)
    [Exploded sesame ball]
  8. Roll ball in sesame make cover. 
  9. Hot oil frying to float the ball and delicious gold tint. 
  10. Drain on dish lined with paper towel. Best eat fresh. 
(Wow, writing in Engrish is really brain-numbing... I don't know how they do it so well in China!)

Gung hei fat choi! 恭喜發財!

*Statistically made-up but likely true.

10 January 2013

'Dangerous' shortcut pressure-cooked pulled pork

A new year and a new resolution! This year, I resolve to experiment with more dangerous techniques that endanger my safety and those around me, but make my food even more delicious. The Mayans were wrong and now, to reap the benefits!

Wimps, such as Gabe who constantly asks me how to cook stuff, however, are scared of kitchen implements that actually facilitate food preparation for busy home cooks. In this case, pulled pork made not in an oven, nor in a slow cooker, but rather in a pressure cooker.
[Pulling the pork. You can do it!]
Pressure cookers, as we know, when use improperly, can explode and maim, which is why one should follow all precautions when using them.

(The subtitle for this entry should be Why Gabe does not own any sharp knives. The answer to that question, folks, is because he is a wimp. The smirk on his face just says "Can't I just use scissors?"...)
[Gabe the meat-lover and carnivore wimp]
For a 4.5lb (3kg) chunk of pork butt, I would say a good hour and half (vs. 4 to 8 hours on a grill or in an oven or slow cooker). The only downside is that any amount of sugar (be it from the brine, the spices, or the BBQ sauce) will likely burn at the bottom of the pot while the meat cooks.
[You reading this caption probably took longer than this pulled pork sandwich topped with some random coleslaw existed IRL.]
I probably should have read Miss Vickie's pressure cooker tips on how to avoid scorching my food before trying this the first three times; she recommends lowering the temperature to the lowest temperature required to maintain pressure as soon as your pressure is attained. Also her PIP (pan-in-pan) technique might come in useful; perhaps I shall try AlfoillingingIP (aluminium foil in pan) technique next attempt (soon to be patented if it works).

(Meanwhile, check out these fab recipes for pulled pork from Amazing Ribs, Chefs George Siu & Park Heffelfinger from Memphis Blues (VAN), or BBQ guru Steve Raichlen.)